
How to use Crossbar
Getting Started
Create an Account
- Click the "Sign Up" button at the top left of the page
- Enter an email address and password
- A verification email will be sent to the email you entered to activate the Crossbar account
- Once you have verified the account, you'll be able to enter your name and phone number to complete the account registration
Adding Participant(s)
After you complete your account setup, you'll be automatically prompted to add a Participant/Player to you account.
Account Menu
When logged into your Account on the Bozeman Hockey website, you'll see the following options when you choose "Account" at the top left of the site.
Participants: Add participants (players) that will be associated with the account, as well as edit details for those participants.
Teams: Shows your assigned teams. Clicking on the team will take you to the team page.
Volunteer: Sign up for volunteer events your organization has added.
Billing: View your balances/payments and update your payment methods on file.
Settings: Update your account name, phone number, email address and password.
Notifications: Set notifications for games and practices. Ensure to have these selected to receive all communications from BAHA.
Add a Parent/Guardian to a Player Profile
Adding a new user account is easy and you can add as many accounts as you need. An Account is a registered Crossbar user who has access to a player's information, the ability to modify/register the player, and will receive email correspondence for the player. It is recommended that all parents/guardians who will bring a player to practice and/or games be added to that player's profile by following the instructions below. These instructions must be completed by a User Account that already has access to the participant.
- Log in to the BAHA website (this must be done on the website, not the mobile application)
- Click Account in the top left navigation bar
- Click on the participant in question to view their profile
- Under the player's name, in the Accounts section, click "+ Add"
- Enter the new user's email address
- If the user already has an account, they will be added immediately
- If the user does not have an account, then a verification email will be sent to them. They must click on the link to verify their email and then create an account
- Accounts associated with the child can check to see who has been added by following steps 1 through 3 at any time
Need to add more than one? Refresh the page and you can add another.
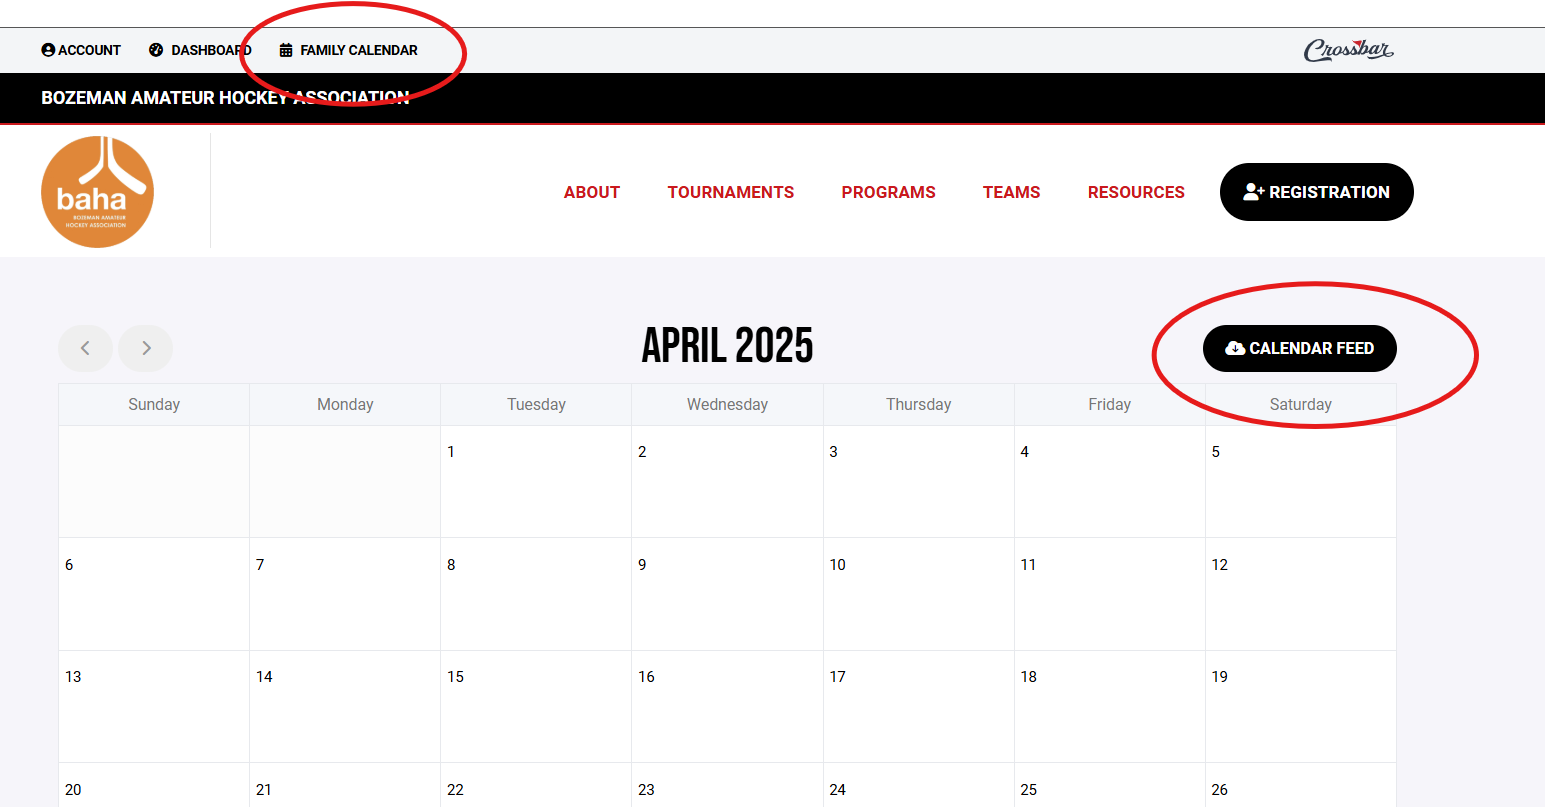
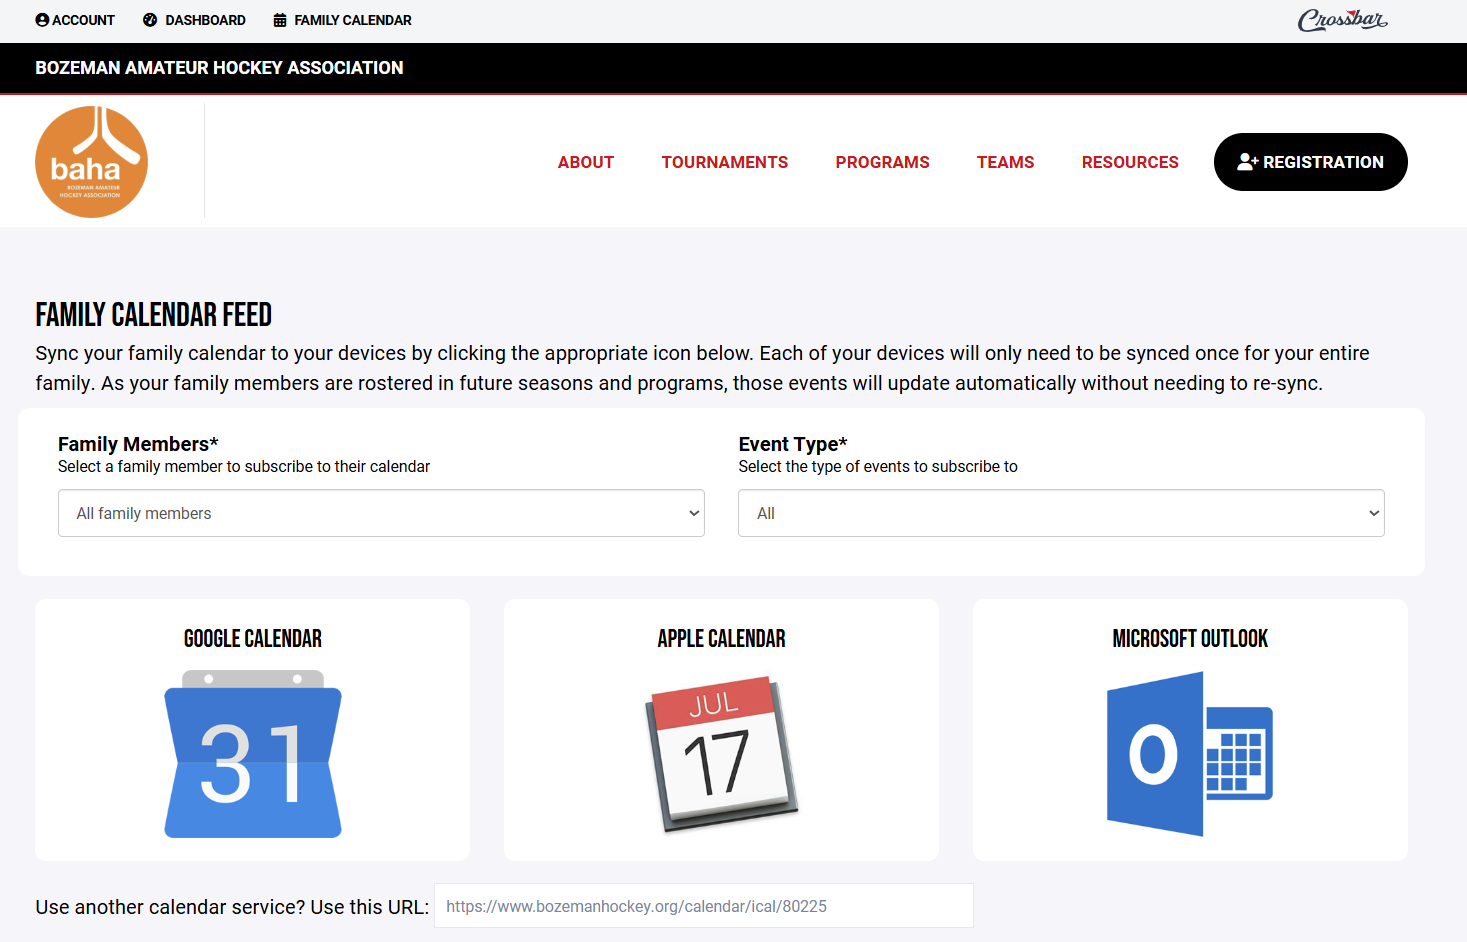
Setting Up Your Family Calendar
Sync your calendar to your personal device from the BAHA website.
- Ensure you are logged in
- Navigate to the Family Calendar at the top of the website
- Download a Calendar Feed
- Select your Calendar or use the URL
Managing Your Payments
To view a summary of your payments or edit your payment method:
- Login to Crossbar
- Go to "Account" in the top-left of the page on desktop or in the navigation dropdown on mobile
- Select "Billing" from the left menu
The Billing page allows you to view your payments/balances, as well as edit or remove old Payment Methods. The payments & dates are listed. Note - payments are processed automatically on the dates listed and it may take a couple of days before they appear on bank statement or credit card account.
Updating your payment information
Only future-scheduled payments can have payment details updated.
- Login into Crossbar
- Go to "Account" in the top-left of the page on desktop or in the navigation dropdown on mobile
- Click on the player whose payment information needs updated
- Scroll down to the "Registration History" section
- Click on "View Details" on the registration that needs updated
- In the payment method column, click the "Edit" link
- If there is no edit link, it is likely because the payment has already been charged or canceled
- Enter your updated card information, select the payments you want to update
- Save and exit